Difference between revisions of "Hardware: Hive Interface Board 1.0"
(→Introduction) |
(→Real Time Clock) |
||
| (6 intermediate revisions by the same user not shown) | |||
| Line 8: | Line 8: | ||
The order in which the sensors pug in is different between version 0.2 and versions 0.3 and greater. Unplug the HX711 to read the version. | The order in which the sensors pug in is different between version 0.2 and versions 0.3 and greater. Unplug the HX711 to read the version. | ||
| − | ===Design=== | + | ===Design Tools=== |
| − | The HiveTool Hive Interface board was designed using [http://geda-project.org/ gEDA schematic capture and Printed Circuit Board (PCB) layout software]. The | + | The HiveTool Hive Interface board was designed using [http://geda-project.org/ gEDA schematic capture and Printed Circuit Board (PCB) layout software]. The gEDA package is installed on the HiveToll images. |
| − | + | ===Schematics and PCB layout=== | |
| − | [[Media:HiveHAT1-0.pdf|Version 1.0 (pdf)]] | + | The schematics, pcb layout and Gerber files are included on the latest image in /home/hardware. |
| + | |||
| + | [[Media:HiveHAT1-0.pdf|Schematic Version 1.0 (pdf)]] | ||
<br clear=all> | <br clear=all> | ||
| Line 21: | Line 23: | ||
==Analog Loadcell Inputs== | ==Analog Loadcell Inputs== | ||
[[File:HiveHAT1-0 analog.jpg|thumb|500px|Load Cell Inputs]] | [[File:HiveHAT1-0 analog.jpg|thumb|500px|Load Cell Inputs]] | ||
| − | Up to four load cells may be plugged in. They are connected in parallel and the outputs summed. Load cell excitation and analog to digital conversion is done by the HX711. It plugs into Hive Interface headers H8 and H9 in the lower right corner. | + | Up to four load cells may be plugged in. They are connected in parallel and the outputs summed. |
| + | ===Analog to Digital Conversion=== | ||
| + | Load cell excitation and analog to digital conversion is done by the [[Sensors: HX711|HX711]]. It plugs into Hive Interface headers H8 and H9 in the lower right corner. | ||
<br clear=all> | <br clear=all> | ||
| Line 42: | Line 46: | ||
|TSL2561 [[Sensors: TSL2591|TSL2591]] [[Sensors: BME680|BME680]] | |TSL2561 [[Sensors: TSL2591|TSL2591]] [[Sensors: BME680|BME680]] | ||
|- | |- | ||
| − | |Hive Temp | + | |Hive Temp RH |
|GPIO/1-Wire | |GPIO/1-Wire | ||
|DHT:13 1-Wire:11 | |DHT:13 1-Wire:11 | ||
|DHT11 [[Sensors: DHT22|DHT22]] [[Sensors: DS18B20|DS18B20]] | |DHT11 [[Sensors: DHT22|DHT22]] [[Sensors: DS18B20|DS18B20]] | ||
|- | |- | ||
| − | |Ambient Temp | + | |Ambient Temp RH |
|GPIO/1-Wire | |GPIO/1-Wire | ||
|DHT:15 1-Wire:11 | |DHT:15 1-Wire:11 | ||
| Line 85: | Line 89: | ||
[[File:Ds3231-1.jpg|thumb|500px|DS3231 Real Time Clock]] | [[File:Ds3231-1.jpg|thumb|500px|DS3231 Real Time Clock]] | ||
| − | If the hive monitor is run without Internet access to NTP | + | If the hive monitor is run without Internet access to National Time Protocol (NTP) servers, a Real Time Clock (RTC) is essential. The DS3231 RTC board plugs into header H2 located on the upper right. |
[[Real Time Clock RTC|More details on the RTC]] | [[Real Time Clock RTC|More details on the RTC]] | ||
Latest revision as of 17:30, 28 August 2018
Contents
Introduction
Version 1.0 of the Hive Interface Board has been tested and will soon enter production. As suggested by the 1.0 designation, this is considered to be "done" and should be the final release of this design. See the Changes section below for changes in version 1.0. Many of the details of version 0.3 apply to version 1.0.
The order in which the sensors pug in is different between version 0.2 and versions 0.3 and greater. Unplug the HX711 to read the version.
Design Tools
The HiveTool Hive Interface board was designed using gEDA schematic capture and Printed Circuit Board (PCB) layout software. The gEDA package is installed on the HiveToll images.
Schematics and PCB layout
The schematics, pcb layout and Gerber files are included on the latest image in /home/hardware.
GPIO List
Handy list of Pi GPIO pin numbers, names and purposes.
Analog Loadcell Inputs
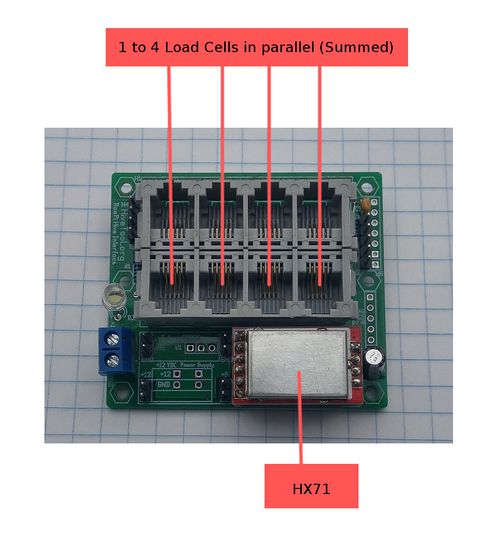
Up to four load cells may be plugged in. They are connected in parallel and the outputs summed.
Analog to Digital Conversion
Load cell excitation and analog to digital conversion is done by the HX711. It plugs into Hive Interface headers H8 and H9 in the lower right corner.
Digital Sensor Inputs
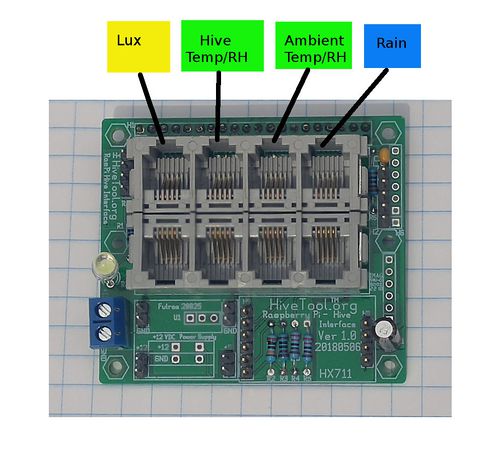
This is the default sensor configuration but others are possible. The I2C bus communicates with the TSL2195 lux sensor, the DS3231 RTC and the BME680 Temp/Humidity/Pressure/Gas sensor.
| Hive Interface Board Digital Sensor Inputs | |||
|---|---|---|---|
| Name/Purpose | Interface | Header Pins | Sensors |
| Lux | I2C | 3, 5 | TSL2561 TSL2591 BME680 |
| Hive Temp RH | GPIO/1-Wire | DHT:13 1-Wire:11 | DHT11 DHT22 DS18B20 |
| Ambient Temp RH | GPIO/1-Wire | DHT:15 1-Wire:11 | DHT11 DHT22 DS18B20 |
| Rain | GPIO/1-Wire | Rain:22 1-Wire:11 | Tipping bucket rain gage and/orDS18B20 |
| Raspberry Pi default Interfaces | |||
|---|---|---|---|
| Interface | Header Pin | Broadcom GPIO Pins | RPi GPIO Pins |
| I2C | 3, 5 | 2, 3 | 8, 9 |
| 1-Wire | 11 | 17 | 0 |
Real Time Clock
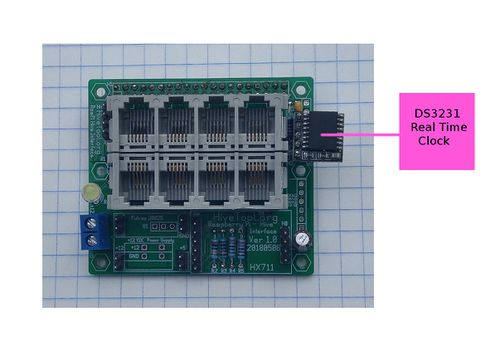
If the hive monitor is run without Internet access to National Time Protocol (NTP) servers, a Real Time Clock (RTC) is essential. The DS3231 RTC board plugs into header H2 located on the upper right.
Serial Console
Useful for command line access via USB connection.
H4 upper left.
Changes
There are minor changes in the 1.0 version:
- Added Real Time Clock (RTC) support so DS3231 will plug into the I2C header H2 without modification.
- Changed 1-Wire connection to Pi's default 1-Wire GPIO by swapping GPIO pin for LED from pin 7 (default 1-Wire) to pin 11.
- Added Chip Enable signal to SPI bus signals on H7.
- Increased hole size for blue 12 VDC power connector from .038" to .042".
Details of changes between version 0.3 and 1.0.
Features
- Plug and Play - all the sensors plug in.
- 12 VDC power supply with battery voltage monitoring
- Supports
- HX711 24 bit ADC and 4 load cells in parallel.
- two DHT22 temperature/humidity sensors.
- unlimited DS18B20 1-Wire temperature sensors (or other 1-Wire devices).
- TSL2591 Lux sensor
- Rain Gauge
Plug and Play. Telco RJ14 (6P4C) connectors are used for all sensors. These are gold plated, reliable, self wiping, inexpensive, readily available, crimp on with an inexpensive crimping tool, lock in place (latch) and as anyone who has tripped over a phone cord can attest, very strong.
Two different power supplies are optional. These are 12 to 5 volt step down highly efficient switching regulators.
The interface board and software works with the A+. B+, Pi2 and Pi3 models. The board will work with the original A or B if a 26 pin header extension is used although the lack of mounting holes in the original Pi is a problem.
This board was designed on the Pi using the gEDA programs gschem and pcb. The programs, schematic and layout files are included on the latest image.


