XXX: Install Hivetool SD image
This page is old. Please see Software: Install Hivetool Pi image
Contents
Hivetool is available as a compressed zipped 1.8G micro SD card image for the Raspberry Pi models A,A+.B,B+,Pi2:
Obsolete version: https://drive.google.com/open?id=0B_3xqxGS2psWZ25EMXpoWEVDY2M
It unzips to a 4,4 G image for the SD card, same size as 2015-09-24-raspbian-jessie.img that it is based on.
The md5sum is of 2015-09-24-raspbian-hivetool.img is:
34e11011faf94dbc0d4ba23e3abf130e
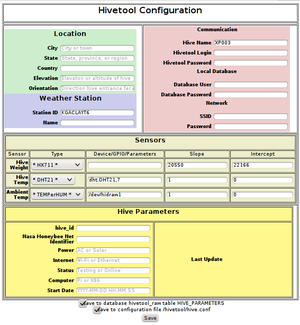
- Most setup is with a user friendly browser based configuration screen.
- Uses SQLite for a database. (Works on an A but graphing is still slow.)
- Has the latest graphing software (complete with the latest bugs)
Create SD card
Be careful. REMOVE any other USB memory devices from your computer.
Windows system
Requires Win32diskImager
- Download the compressed image,
- Extract the compressed folder (unzip) to get "2015-09-24-raspbian-hivetool.img"
- Download and install Win32diskImager if not already installed.
- Insert a blank formatted SD (micro for A+ & B+ ) class 10 card in PC.
- Run Win32diskImager, select the uncompressed "2015-09-24-raspbian-hivetool.img" file
- write it to it to the SD card (usually drive E) using Win32diskImager. CAUTION DO NOT write to C:\, the hard drive.
- Verify the write has completed and verify the files size on SD card is 9.68 mb (10,158,080 bytes), 12 files, eject the SD card labelled "boot" if successful.
raspberrypi.org recommends using: http://sourceforge.net/projects/win32diskimager/ But be careful. REMOVE any other USB memory devices from your computer. Detailed instructions: http://elinux.org/RPi_Easy_SD_Card_Setup#Flashing_the_SD_Card_using_Windows
Unix/Linux system
- Unzip the compressed image:
unzip 2015-09-24-raspbian-hivetool.zip
- Calculate the md5sum:
md5sum 2015-09-24-raspbian-hivetool.img
- Determine the device for the card reader
- The built in card reader on my laptop is /dev/mmcblk0
- A USB card reader is /dev/sdb (if there is only one hard drive).
- Copy the image to the SD card:
- dd bs=4M if=2015-09-24-raspbian-hivetool.img of=/dev/mmcblk0
Warning!! If you reverse the source and target, or get the target drive wrong, you can wipe out a lot of data. This feature has inspired the nickname "dd" Data Destroyer.
Detailed instructions: http://elinux.org/RPi_Easy_SD_Card_Setup#Flashing_the_SD_Card_using_Linux_.28including_on_a_Pi.21.29
Apple MAC OS
http://www.raspberrypi.org/documentation/installation/installing-images/mac.md
Boot Pi
- To configure Raspian Linux on the target Pi, either:
- Attach a display (HDMI or video), and a USB keyboard and mouse.
- Use a USB/TTL serial adapter cable and connect to a computer with terminal emulation software (HyperTerm, PuTTY, minicom).
- On B models connect the Ethernet port to a router with DHCP and Secure Shell (ssh) into the Pi using Putty or ssh.
- Insert SD card in the Pi and apply power.
- If the OS image, Pi hardware is good (including 5V power) and video is connected, the system will boot to the linux command line login prompt:
NOTE that when typing the password, no characters (even *) are echoed to the screen. The keyboard is not broken.
raspberrypi login: pi
Password:
Last login: Mon Jan 12 02:53:54 UTC 2015 on ttyAMA0
Linux raspberrypi 3.12.35+ #730 PREEMPT Fri Dec 19 18:31:24 GMT 2014 armv6l

The programs included with the Debian GNU/Linux system are free software;
the exact distribution terms for each program are described in the
individual files in /usr/share/doc/*/copyright.

Debian GNU/Linux comes with ABSOLUTELY NO WARRANTY, to the extent
permitted by applicable law.

NOTICE: the software on this Raspberry Pi has not been fully configured. Please run 'sudo raspi-config'

pi@raspberrypi:~$
Run raspi-config
- Expand the file system (option 1), enable "desktop" (layperson), or "command line" interface (2).
- Select Internationalization Options (3), I1 Locale, for USA select "en_US.UTF-8 UTF-8", Set timezone (I2)
- Enable Pi to work with the Pi Camera if applicable (5).
- Advanced (6) Set visible name to match name you intend to use for reporting to the Hivetool server. Enable SSH (A4) for remote access. Enable SPI, I2C, as it applies to your particular sensors (A5-7). Advanced - "Update config tool to latest version" (A9).
- "Finish" and restart at pi prompt; sudo shutdown -r 0
- At command prompt run; sudo apt-get update
- At command prompt run; sudo apt-get upgrade
Wi-Fi Setup
Setup WiFi (skip for hardwired Ethernet), insert WiFi dongle into USB jack, run "startx" to start the GUI Run the WiFi Configuration (supplicant), scan and add your access point (remove "dlink"), enter your AP password in the PSK field under "manage networks". The Configurator tells you what IP has been allocated. If you stay with DHCP then reserve the address in your router so you will always get the same one on the Pi.
Ethernet
Alternatively plug an Ethernet cable into the RJ45 jack (Not on the A model), you will need to determine what IP has been assigned by looking on your Router Tables or using the Ping command. Once known you can navigate to it with your browser. Your address is likely something like http://192.168.X.XXX/config.pl
Configure Hivetool
See Configure Hivetool for instructions.
