Difference between revisions of "Interface the HX711 to Pi"
| Line 42: | Line 42: | ||
==Calibration== | ==Calibration== | ||
| − | ==HX711 Spec | + | <br clear=all> |
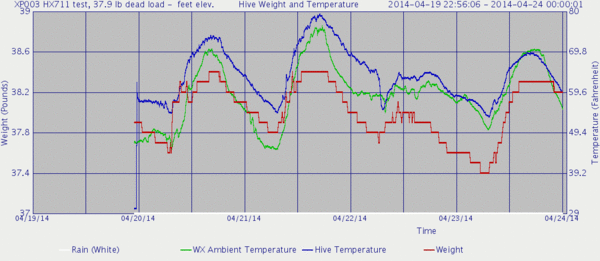
| + | [[File:XP003_HX711_20140424.gif|thumb|right|600px|Temperature drift using the HX711 and CZL635]] | ||
| + | ==HX711 Spec Sheets== | ||
http://hivetool.org/w/images/d/d2/Hx711_english.pdf | http://hivetool.org/w/images/d/d2/Hx711_english.pdf | ||
==Load Cell Spec Sheet== | ==Load Cell Spec Sheet== | ||
[http://www.phidgets.com/products.php?category=34&product_id=3135_0 CZL635 from Phidgets.com] | [http://www.phidgets.com/products.php?category=34&product_id=3135_0 CZL635 from Phidgets.com] | ||
| − | |||
| − | |||
Revision as of 02:40, 24 April 2014
Building a Raspberry based electronic scale using the DCT Electronic HX711 board is as easy as Pi!
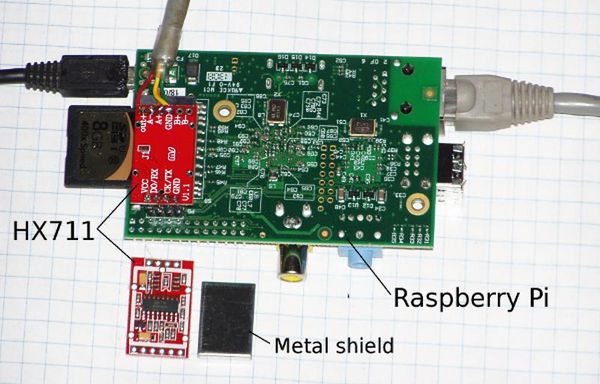
The DCT board comes with two sets of male headers, straight and right angle, and a metal shield.
You will need a 1x4 female header (2.54mm Pitch Straight Single Row PCB Female Pin Headers) and load cells.
- Order the board for $6.99 on Ebay
This one for $2.19 should work, too. - Download the software from gitHub
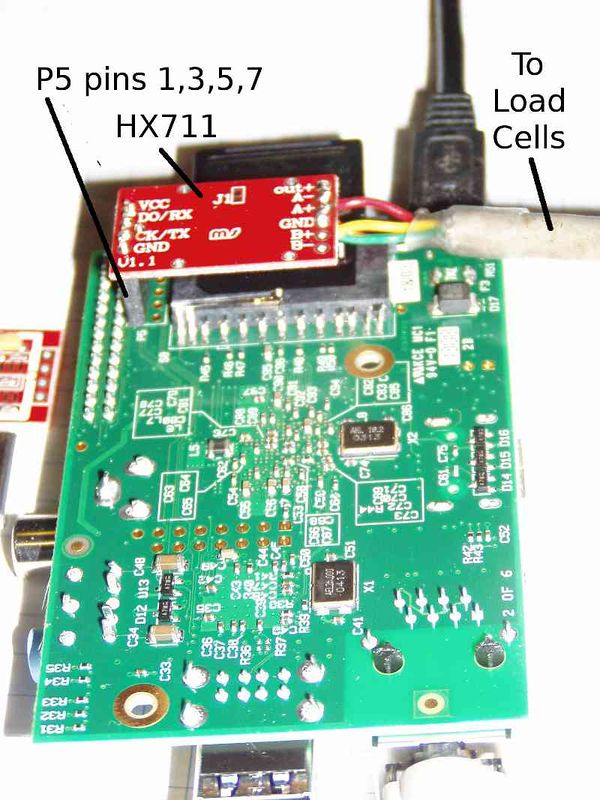
git clone https://github.com/ggurov/hx711 - Solder a 1x4 straight female header in P5 on Pi (bottom side of board) and a 1x4 male header on the DCT board
- Solder the load cells to the DCT board.
- Plug the DTC board into the Pi.
- Change the GPIO pins in hx711.c from 30 and 31 to 28 and 30. This way they are all on one side of P5:
#define CLOCK_PIN       30
#define DATA_PIN        28
| P5 | Pi | HX711 |
|---|---|---|
| P5-1 | +5 | Vcc |
| P5-3 | GPIO28 | DO/RX |
| P5-5 | GPIO30 | CK/TX |
| P5-7 | Ground | GND |
Calibration
HX711 Spec Sheets
http://hivetool.org/w/images/d/d2/Hx711_english.pdf


